Peggy Fasano, Chief Operating Officer, Boulder iQ09.10.21
Fantasy: Your startup company’s initial fundraising efforts were successful, and you are making admirable progress on your product concept with the seed funding you received. A smart engineer spends several hours with a CAD drawing program, sends the resulting file to a 3D printer, and comes up with a slick-looking model for an upcoming presentation. The model awes investors, and they clamor to get a jump on the competition by suggesting (demanding) you move quickly into production.
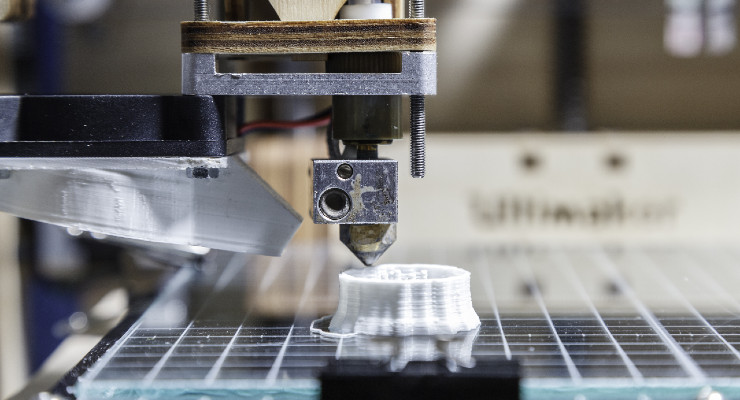
Reality: Today, it’s very possible for a person skilled at using a computer-aided design program to produce something flashy to show investors. It works well for that purpose. But in any industry, developing a 3D model is a very different operation from developing a product that is ready for market launch. In the medical device industry, the differences between a prototype and a saleable product are much greater, more significant, and have much larger consequences.
The Pareto Principle
The Pareto Principle states, for many outcomes, about 80 percent of consequences come from 20 percent of causes. Startup medical product companies can interpret the principle as, “It will look like you’re 80 percent of the way done, when you’re really only 20 percent of the way there.” The availability of 3D printed models has made the Pareto Principle a great deal more relevant in the industry.
Creating an impressive concept model is a terrific milestone in product development—in the proper context. 3D-printed models are excellent tools for trying out different aesthetic approaches, and can be key in both human factors and preliminary market studies. The advent of 3D printing has made it possible to create several variations of a product for usability engineering sessions and focus groups, for instance.
If your audience—investors or others—understands the 3D-printed model they are admiring is only for visualization purposes, proof of concept, and early-stage testing, 3D has a well-earned place in your business. If there is any chance your audience does not understand the context, they may well assume the product is close to production, given the finished look a 3D model can present. For medical devices, this lack of understanding can easily turn into disappointment and frustration, and lead to significant management and funding consequences.
The Inherent Problems with Production
Many medical device companies try to move directly into production with 3D-printed parts to accelerate the time to market and avoid upfront costs with injection molding. A good grasp and appreciation of the issues in doing so will save resources in every way.
Biocompatibility
If you completed all your biocompatibility testing on a 3D-printed product and now need to move to injection molding, you will most likely need to repeat the testing. Biocompatibility testing is evaluating the manufacturing process as well as the material. If you change the manufacturing process significantly, you will likely need to redo some of the biocompatibility testing. The same concept applies to shifting to different 3D-printed materials and processes.
Volume Production
For a small number of products or parts, 3D printing is quick and relatively inexpensive. So, for needs of 10 or 20 units, it may be a great tool. It is not economical, however, for higher volumes. Once the volume needs increase to a few hundred, 3D printing is likely not the best option. If your product needs to be sterile, you’ll need to complete a shelf-life study and a sterilization validation, which, depending on your sample sizes, may require hundreds of units just to complete these studies.
In addition, injection molding and other manufacturing techniques are much more cost effective once the initial investment of the molds has been made. For example, the parts cost for a 3D-printed part for a sterile, disposable product might be $5. An injection molding tool for relatively small volumes (e.g., good for up to 100,000 units) might cost $20,000. If you need 500 pieces to get through all the testing and into production, the cost with 3D printing would be $2,500 (500 x $5). Next up is biocompatibility testing, which can cost $10,000 to $40,000. Quick-turn ethylene oxide sterilization validation would add another $15,000. Packaging and shipping testing, including shelf-life testing, can cost $5,000 to $10,000. It adds up quickly.
So, with 3D printing, it will cost $2,500 for the parts, and between $30,000 and $65,000 for the full set of qualification tests, along with a $5 parts cost. Later, when volumes dictate it’s time to transition to injection molding, you will need to repeat the biocompatibility testing (again at a cost of up to $40,000).
In contrast, if you were to invest $20,000 for injection molding at the beginning of the project, the per-unit parts cost could realistically be about 25 cents (or less). You’d then effectively be paying for the tooling in the first 5,000 parts. Then, there is one set of testing—nothing to redo.
Sterility Requirements
If the product is a sterile one with which a patient may come into contact, the product must be robust enough to endure a sterilization process. For a plastic 3D-printed part, you will have to ensure the sterilization process does not degrade or effect the part. (Ethylene oxide is usually the best sterilization option for a 3D-printed plastic part.) The process to achieve the sterilization validation is usually relatively expensive and time-consuming, and even then, not all 3D materials can pass the required tests.
Electronics Needs
If the product is an electronic device that will require an enclosure, the material for the enclosure must meet electrical and fire safety standards. Not all 3D-printing materials will be able to meet these requirements. And because the required testing is expensive and time-consuming, developers usually find it makes sense to conduct the testing only with the final product configuration in which materials are certified to meet UL 94-V0 or equivalent standards.
The Role of DFM
Medical device developers are well-advised to perform Design for Manufacturing (DFM) before moving into production. This additional design step ensures the product can be manufactured reliably, will function as intended per the requirements, and can be manufactured at the desired volume and cost targets. A 3D-printed model developed for proof of concept can have significant changes in its design for manufacturing.
If going the DFM route, a developer should think about the manufacturing and assembling techniques, the desired volumes over the next several years, how much the product will be used (including whether it is disposable), and the target cost of goods. Design with manufacturing in mind includes designing for moldability by incorporating drafts, material shrinkage, and uniform wall thicknesses. The design should also include tolerances and manufacturing considerations in the 3D-print files, Geometric Dimensioning and Tolerancing (GDT) techniques, and worst-case stack-up calculations to ensure interchangeable parts.
A word of caution: Remember 3D printers can print almost anything. That doesn’t mean the result will be suitable for manufacturing. They may print with parts that have undercuts, which could never be removed from a production injection mold, and shapes that can’t be reproduced by any other means than 3D printing.
Best Practices
The good news is there are ways to use 3D printing to edge closer to a producible design. The key is in careful planning, keeping the final production process in mind in the early stages of design.
Establish Realistic Expectations
If using 3D printing anywhere within the development process, it’s wise to set expectations at the beginning. Don’t let an executive or an investor get carried away with the look and feel of a good model.
Make a Development Plan
Keep in mind the old adage, “People don’t plan to fail; they fail to plan.” Some (or many) people involved in a product’s creation may not understand all the steps involved in getting a product to market. When developing a medical device, there is a long way to go between concept and market launch, involving design, engineering, quality assurance, manufacturing, sterilization (if needed), and packaging.
Regulatory compliance, in particular, can take substantial time and resources. Steps will include gathering user input, performing risk and hazard assessment, developing design controls, conducting design reviews, building a Design History File, conducting verification and validation testing, conducting standards compliance testing, and transferring to manufacturing (including creation of the Device Master Record). While methods to streamline the process exist and can help tremendously, be sure the plan includes well-thought-out timelines and alternatives.
Iterate
As perfect as the 3D model looks, and as much confidence exists that development and manufacturing will be spot-on the first time, it almost never happens that way. Plan on iterations, and include them in your plan and timelines.
Communicate
Once a realistic schedule has been developed—one that includes contingencies and iterations—be sure to communicate it broadly, and explain it clearly, concisely, and accurately to all audiences. Those may include, but not be limited to, investors, employees, and senior leadership.
Conclusion
The Pareto Principle has existed since Joseph Juran, an engineer and management consultant, generalized the findings of Italian economist Vilfredo Pareto in 1941. The availability and growth of 3D printing just makes it more commonplace in medical device development. While 3D printing is a fantastic tool for quick models and to test concepts, in the world of medical devices, there’s a big gap between fantasy and reality. Understanding how, when, and where to incorporate 3D printing into device development can make the difference between market success and failure.
Peggy Fasano is the chief operating officer of Boulder iQ in Boulder, Colo. She is an expert in product development, project management, and engineering within the medical device and biotech industries. She has held the positions of senior consultant with Deloitte Consulting, managing director of the Deming Center Venture Fund, product development and engineer consultant for Boulder BioMed, and project manager and mechanical engineer for Sophono Inc. She also has worked as a mechanical engineer and project manager at Polestar Technologies. Fasano holds a B.S. in mechanical engineering from Tufts University and an M.B.A. from the University of Colorado. She can be reached at peggy.fasano@boulderiq.com.
